Putting that mantra to work in a birdhouse craft project
DIY (Do It Yourself) projects are the rage.
Combine that idea with that of repurposing (to alter and reuse for a different purpose) and upcycling (converting useless items into new products) – and a masterpiece of “old stuff” is the end result.
Put all three together and that was the inspiration for a recent birdhouse craft project.
Using old banisters, balusters and newel posts scrounged from Care & Share of Mountain Lake, old pieces of lumber from supply of Carol Harder – and steel saved from what once been had been siding of a hip-roof barn as my contribution – we had the items to repurpose and upcycle and were set for an afternoon of DIY work.
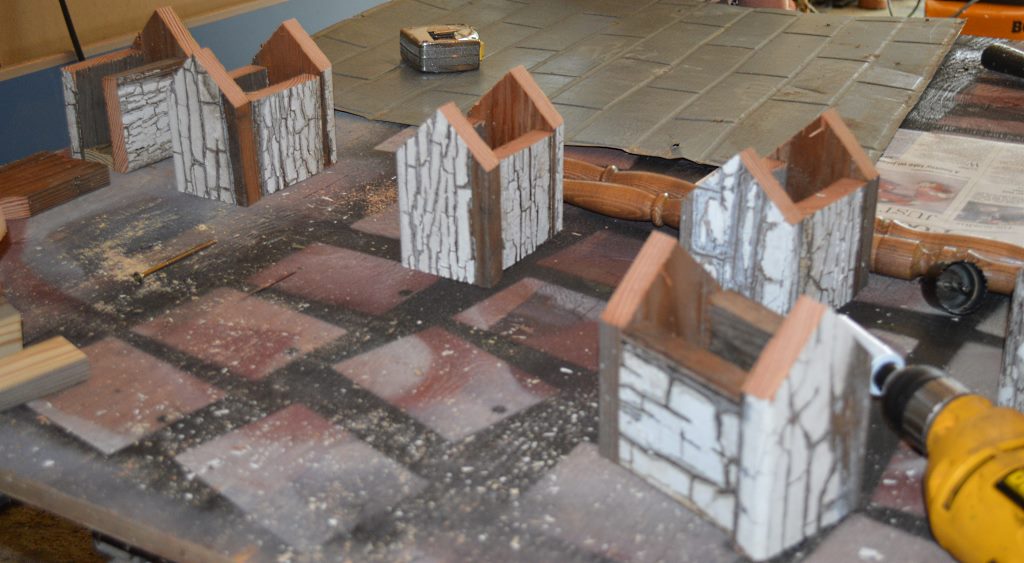
WOOD PIECES CUT out for the birdhouses are aligned in their respective birdhouse shapes, just waiting to be assembled. Cut the size, you need or want. Remember too to cut a base the dimension that works with the four walls of the birdhouse.
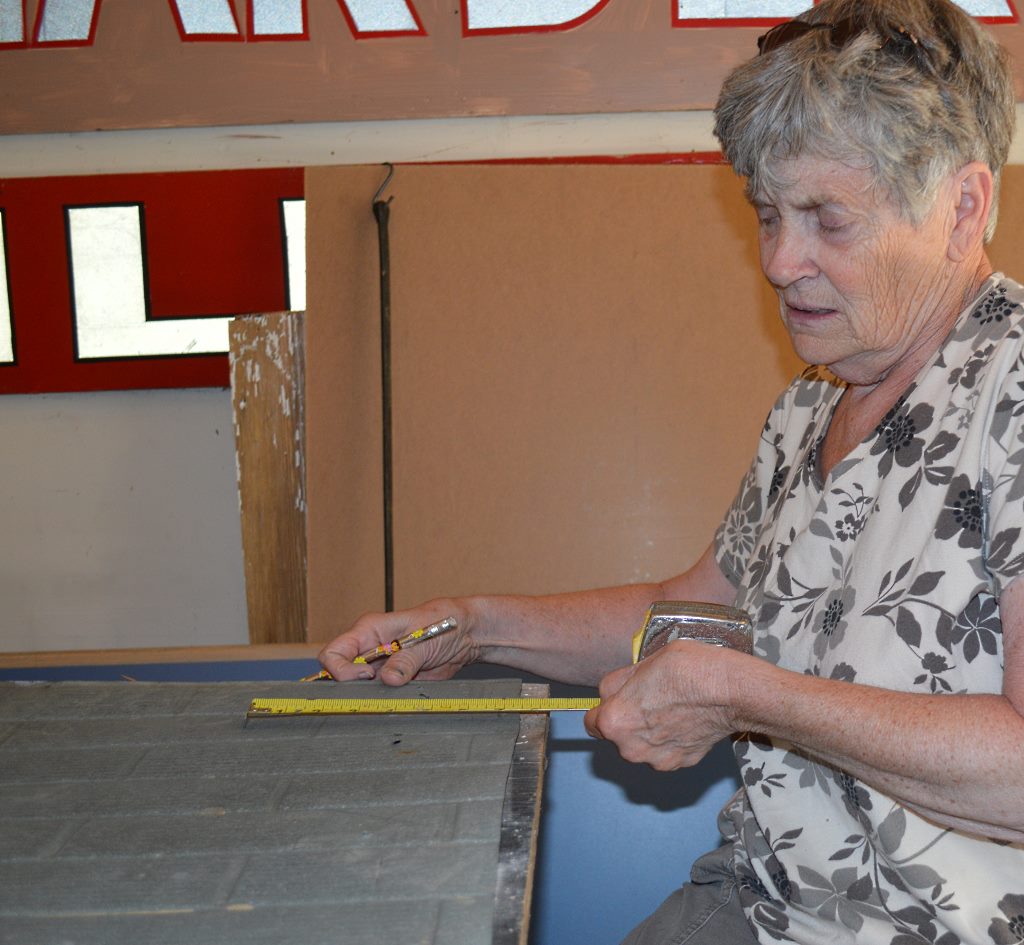
JODY METCALF MEASURES and marks the tin to be used for the roof of each birdhouse.
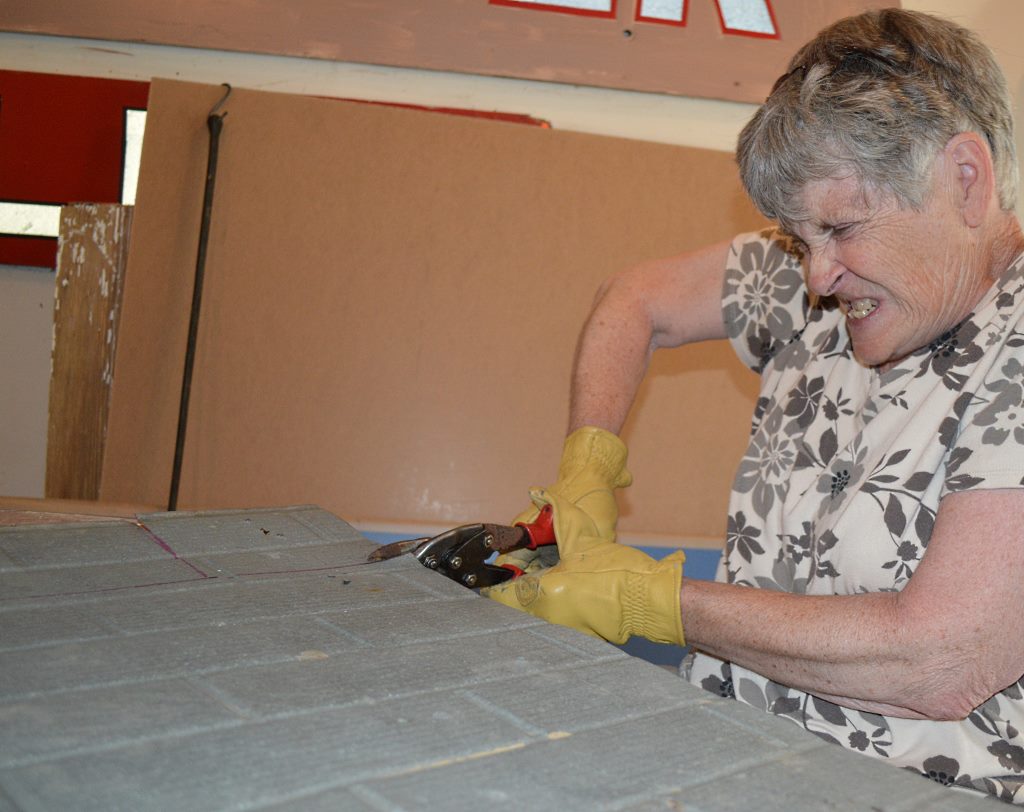
USING A TIN snips, Metcalf dons gloves in an effort to cut out the roof shapes – but finds it to be a difficult task.
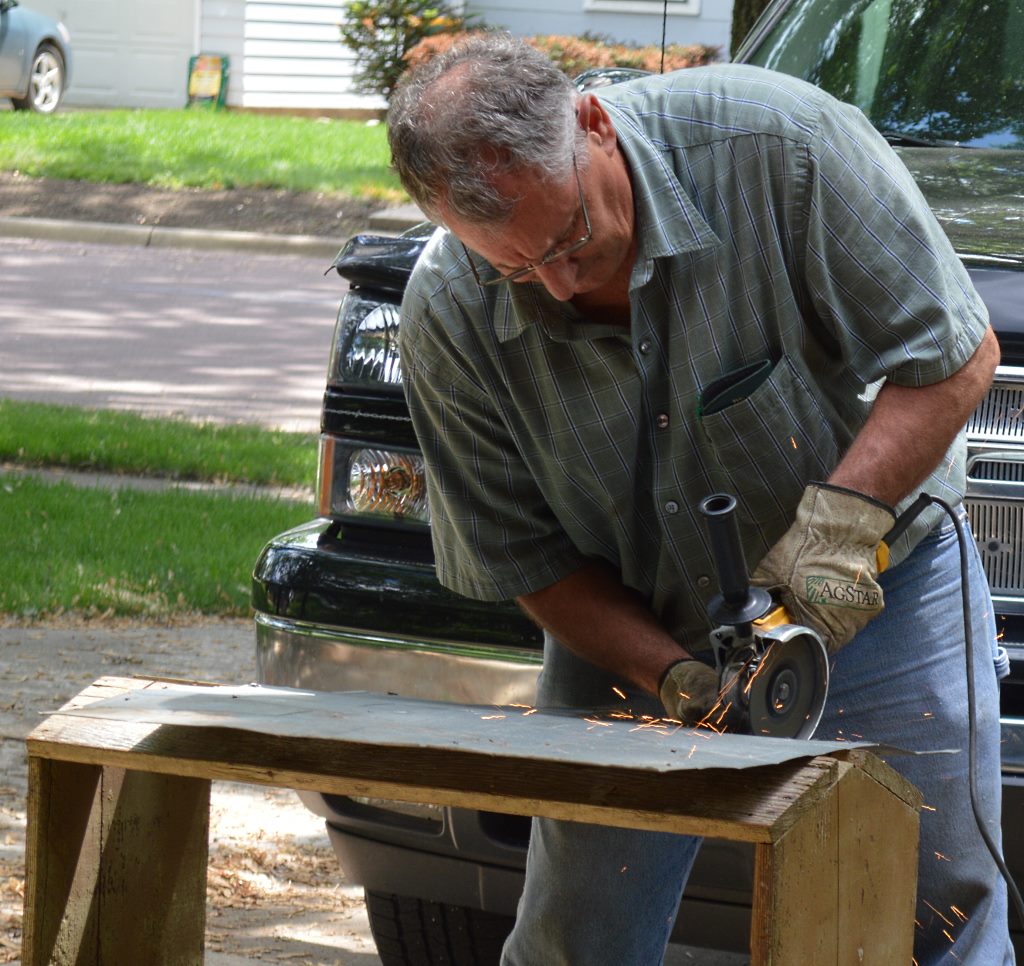
COMING TO THE rescue to cut the tin was Mark Langland, who used a grinder to do the task – as well as file the edges so they would not be so sharp.
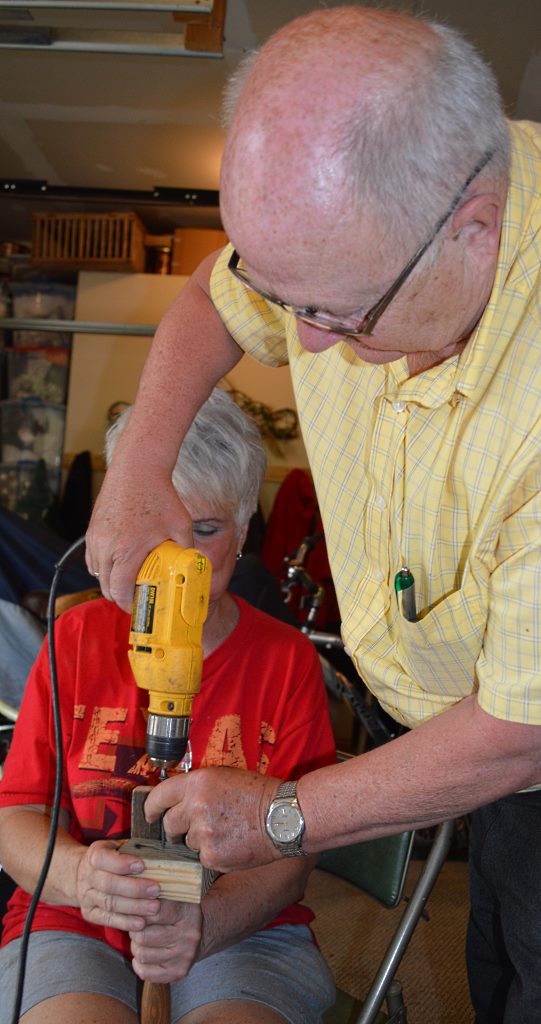
CAROL HARDER USES an electric screwdriver to drive the screws through the base of the birdhouse in order to anchor it to its stand.
CHANGING BITS PROVED to be a bit tricky, so Brian Harder was called in to assist with that task (a couple of times).
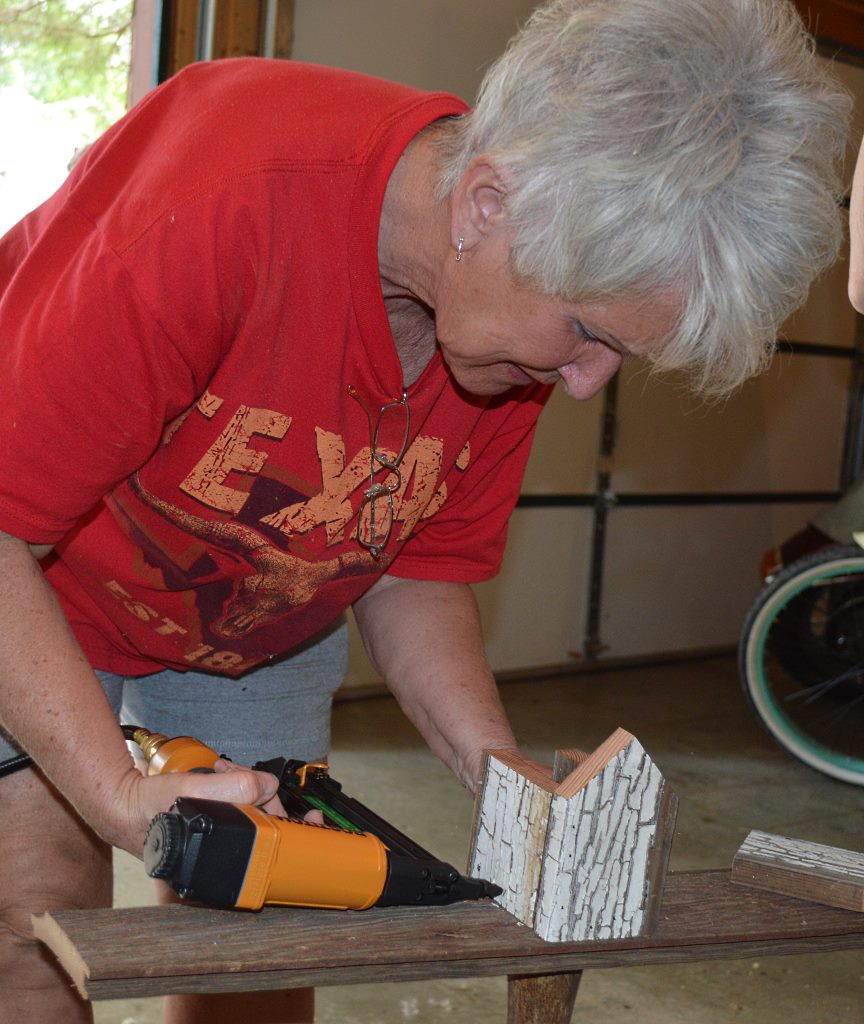
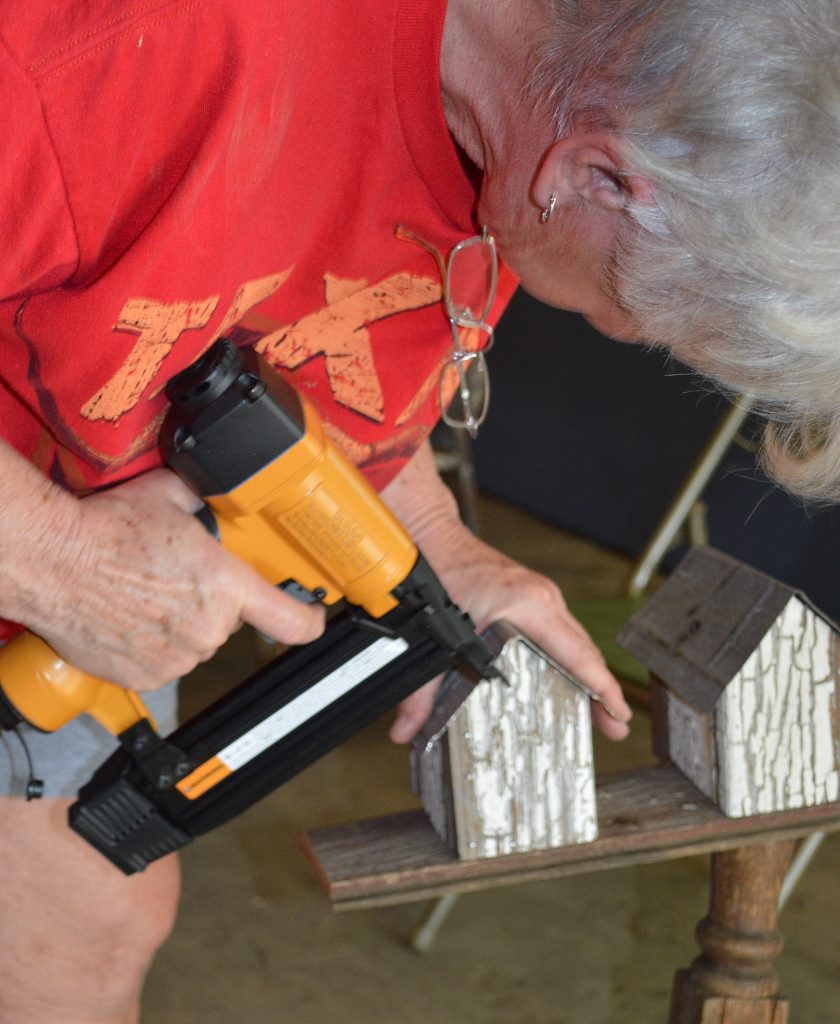
USING A NAIL gun, Harder begins to attach the birdhouse pieces to the base – as well as each other.
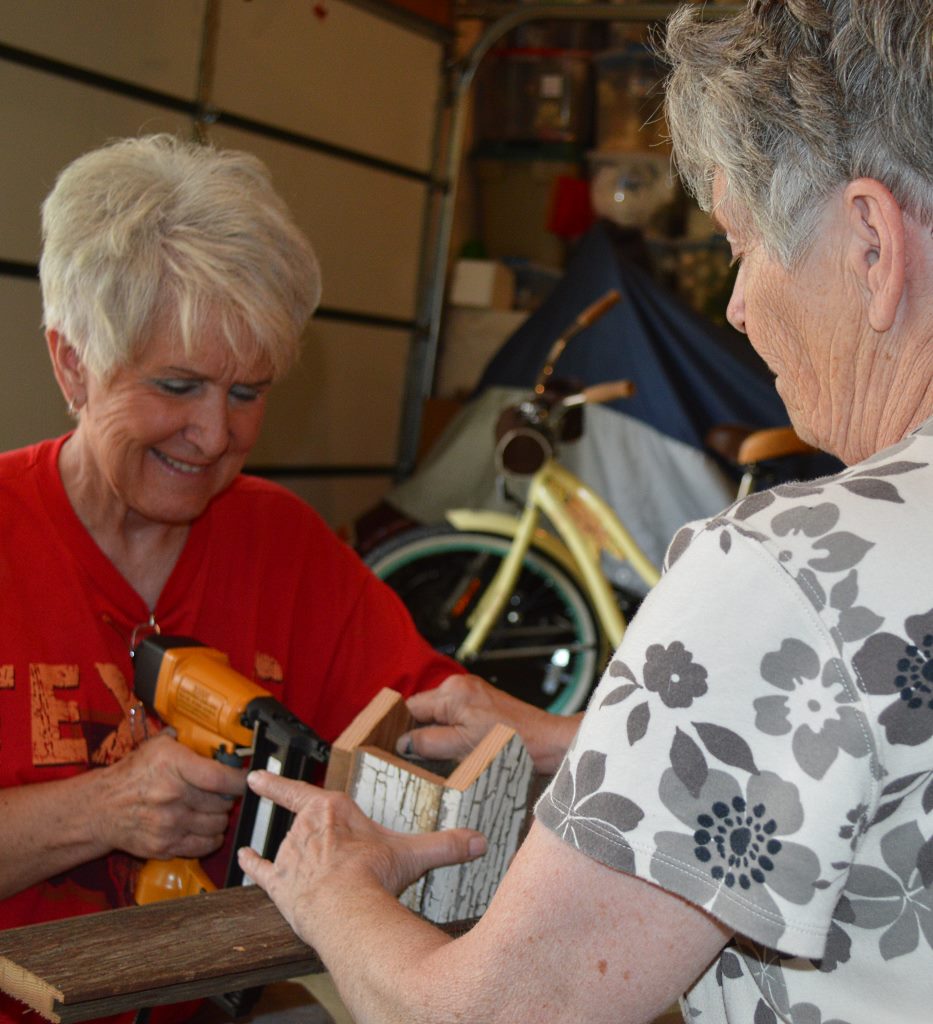
TOGETHER THE WORK went faster; Metcalf holding the birdhouse pieces together as Harder “shot” in the nails.
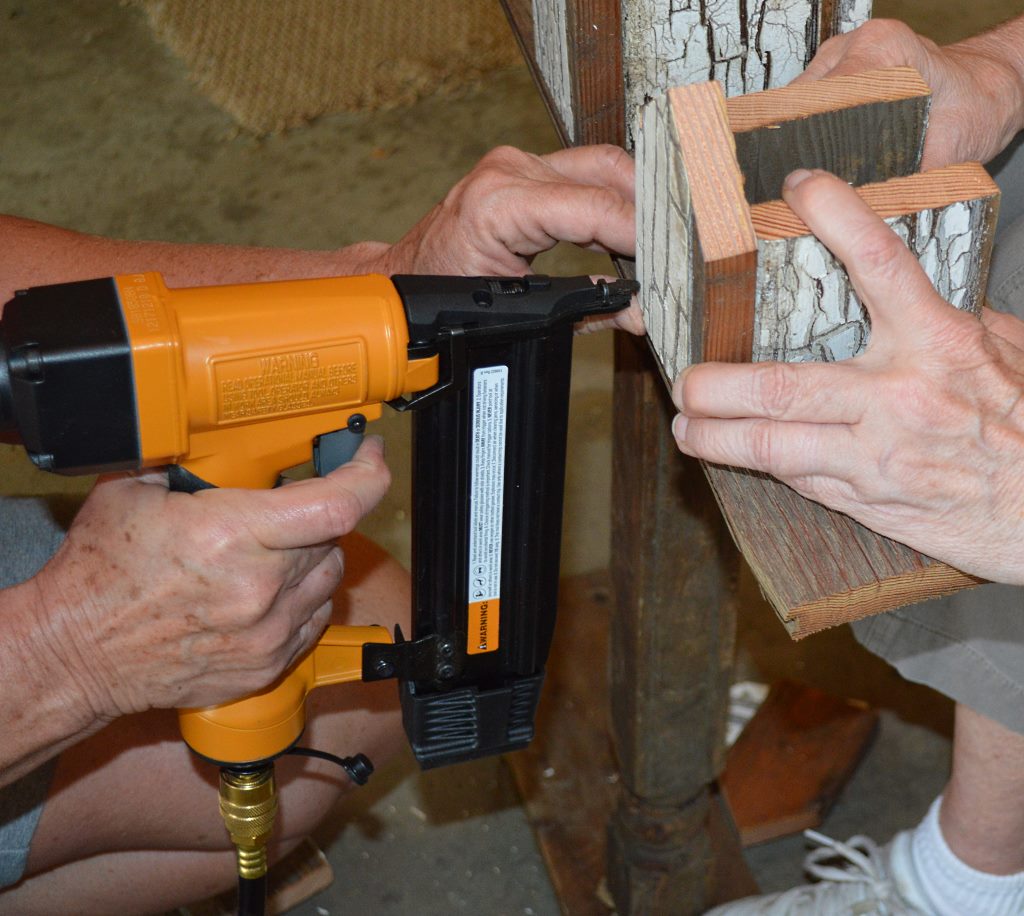
A CLOSE-UP look at the work in progress.
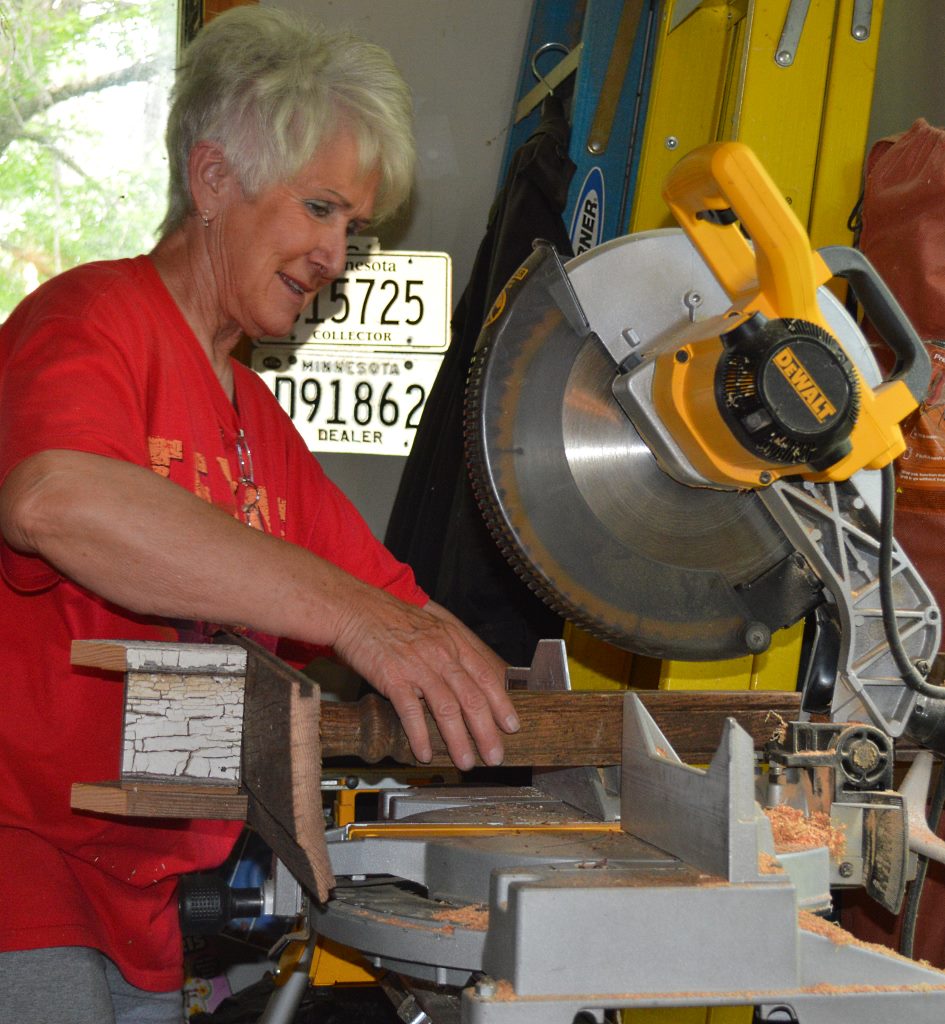
HARDER, WHO HAD earlier cut out the birdhouse pieces, returns to the saw to take “a little” off of one side of the birdhouse stand.
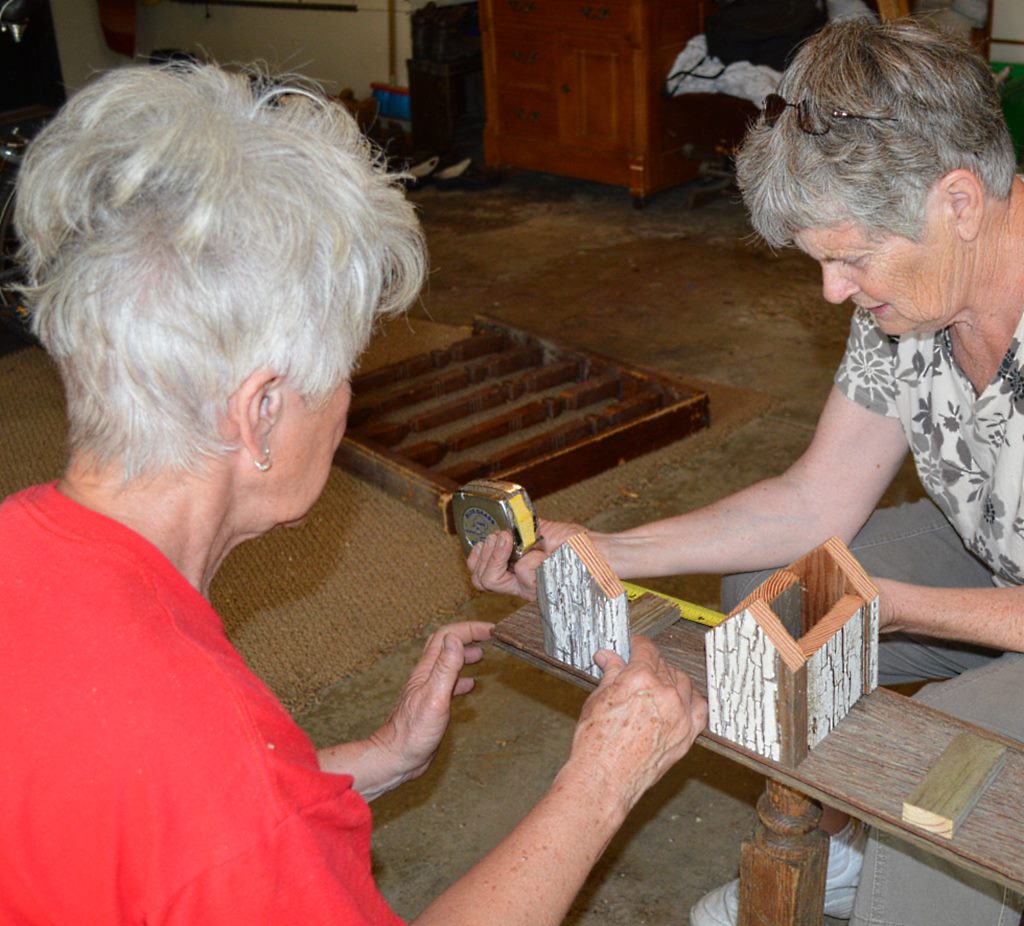
THIS BIRDHOUSE STAND had space for the placement of three birdhouses, so Harder and Metcalf measure to space the trio of bird homes equally and accurately (or “close enough”).
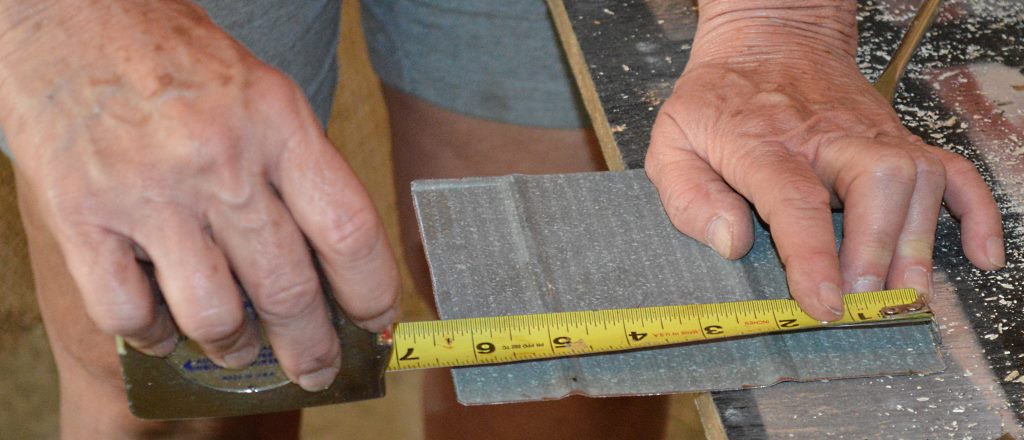
AFTER ALL THE BIRDHOUSES were assembled, it was time to place the roof of each one. Above, Harder measures the cut tin pieces to find their midpoint.
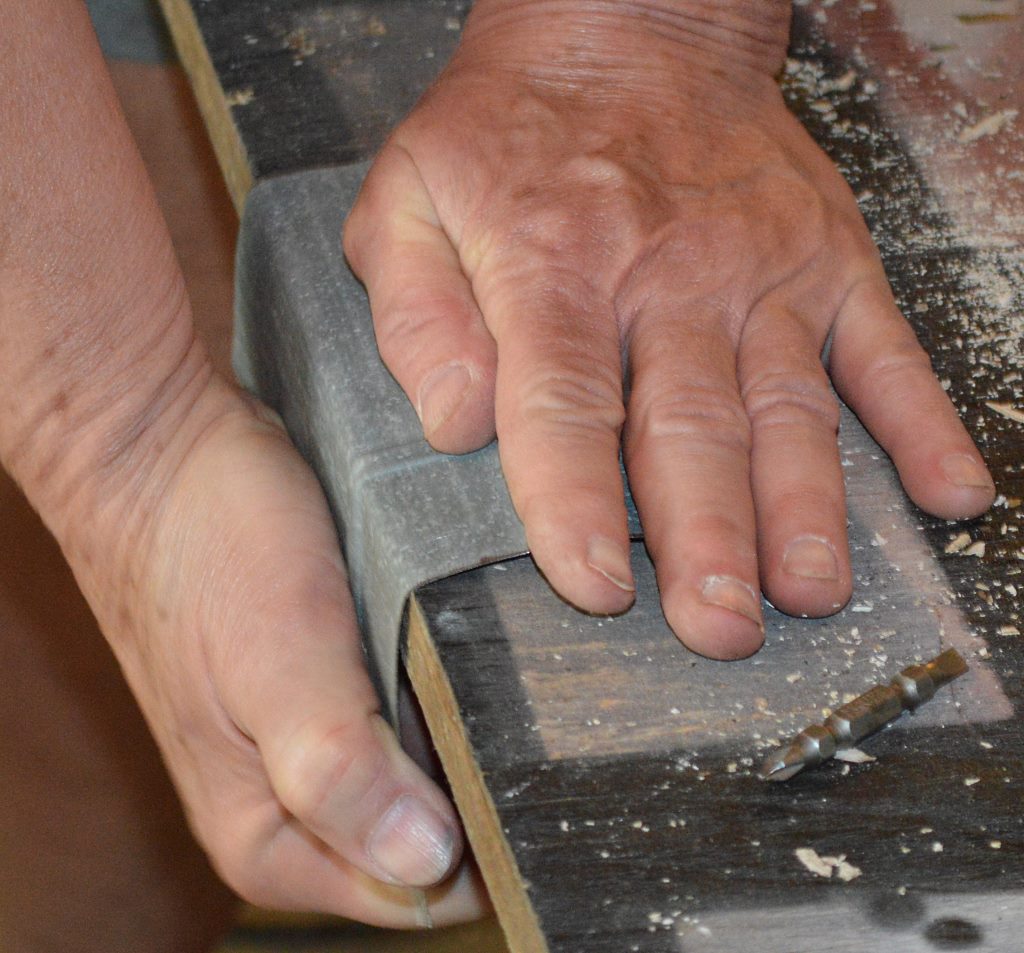
NEXT, HARDER folds the tin at the midpoint to shape the roof of each birdhouse.
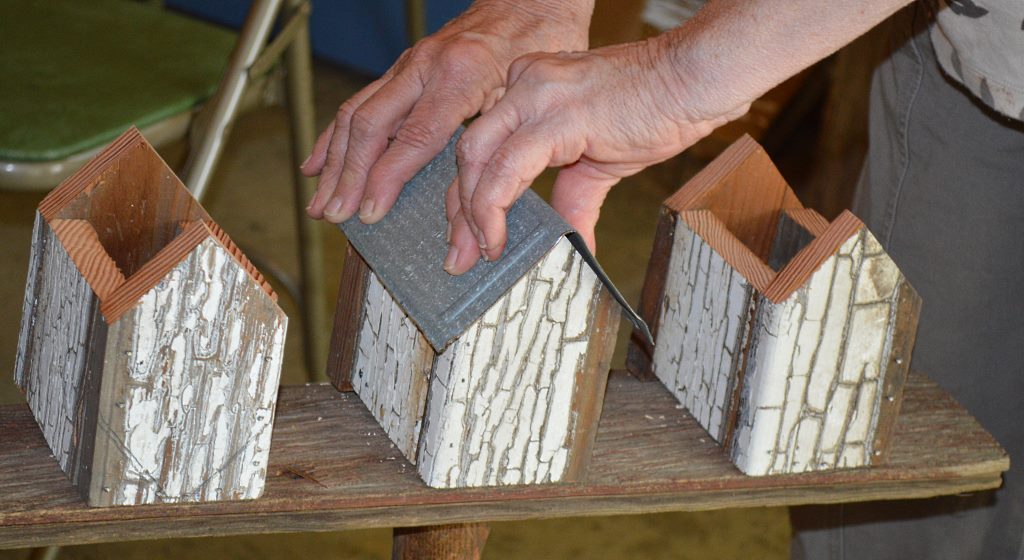
METCALF HOLDS THE folded tin roof in place on a birdhouse.
WHILE HARDER RETURNS to using the nail gun to attach the roof to each birdhouse base.
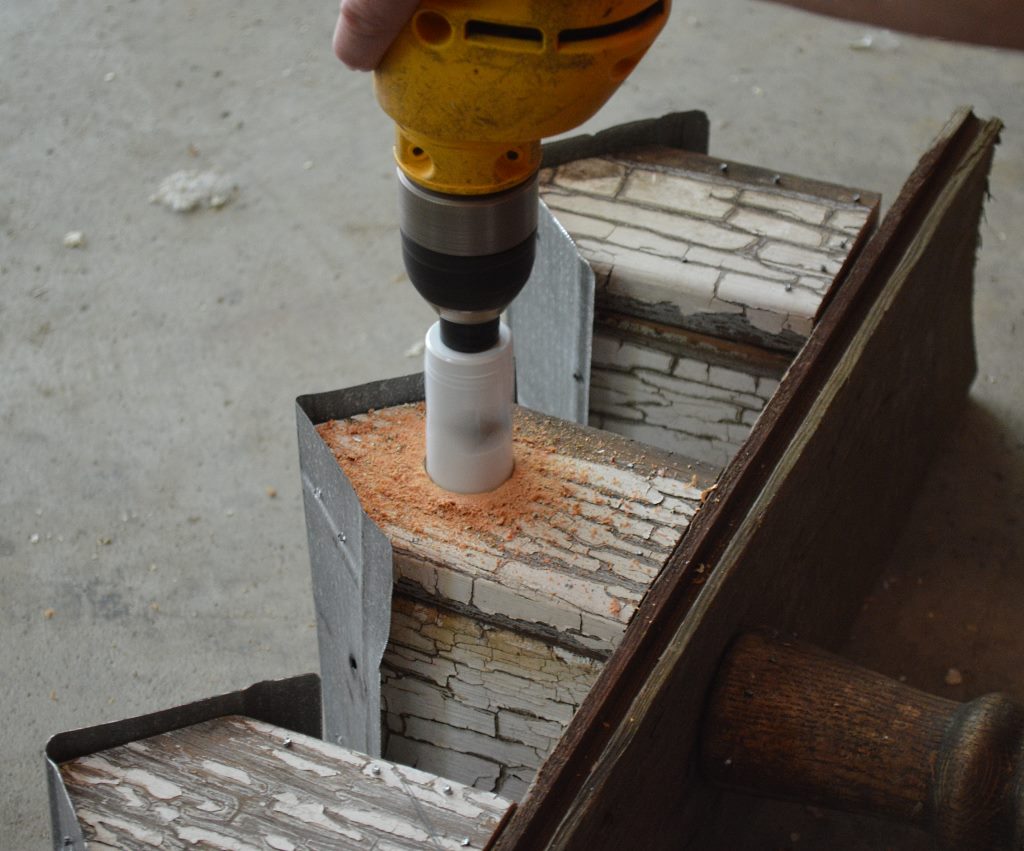
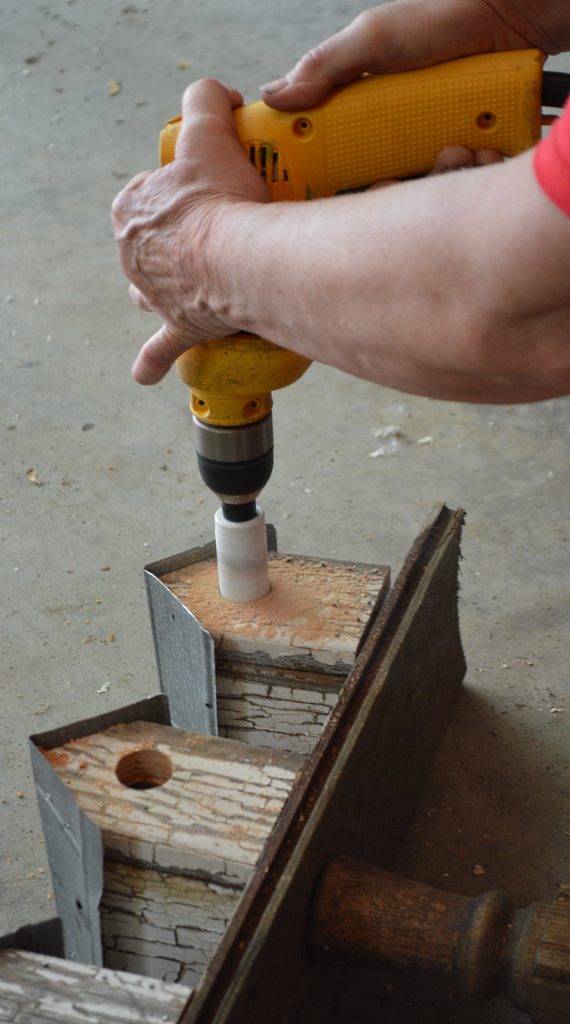
A NEW BIT is attached and the electric screwdriver is transformed, now being used to drill circular openings in each birdhouse.
ANOTHER LOOK AT the drilling of holes in the birdhouse.
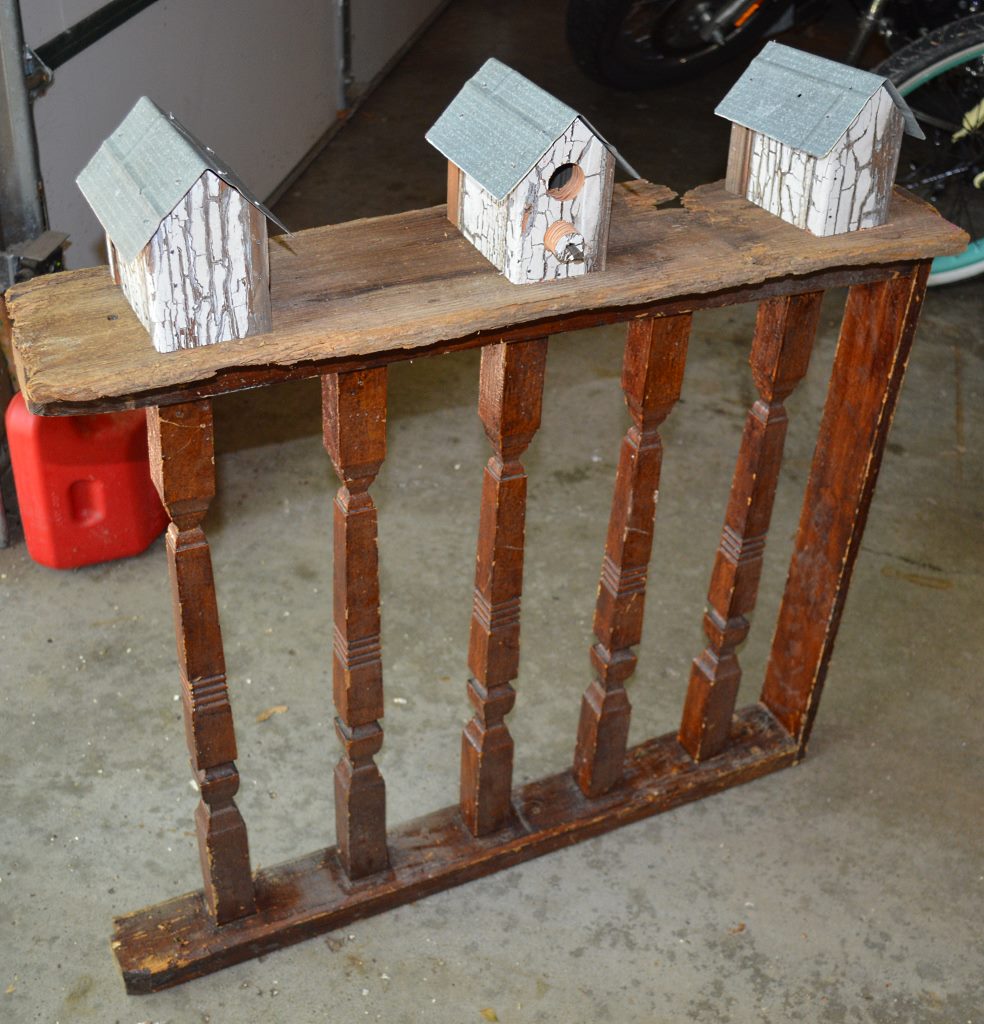
THIS IS METCALF’S completed birdhouse project on its stand – an old single stair baluster with an “aged” board at the bottom as a steady base and a similar board on top on which rests the birdhouses. After the openings were drilled, “perches” for the birds were hammered in using large-size antique nails rescued from a curbside “throwaway.”
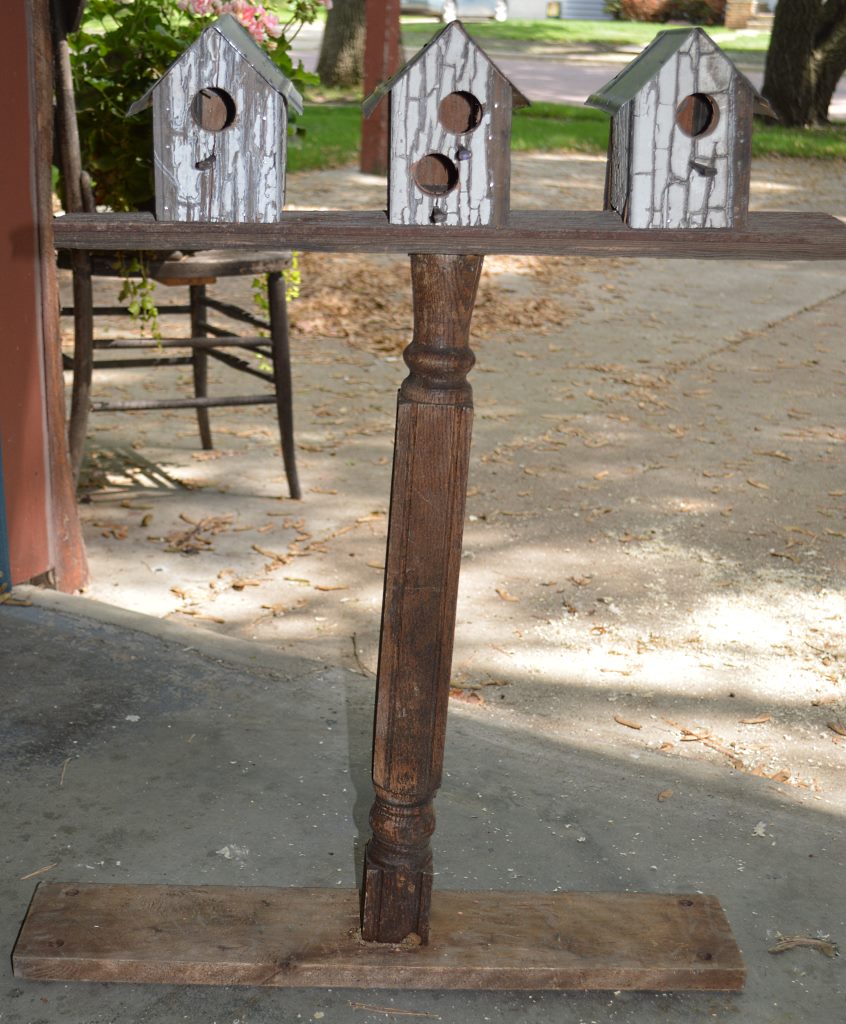
THIS IS MY finished birdhouse, perched atop a banister newel post.
HARDER’S BIRDHOUSE PROJECT is not quite finished; a couple more openings need to be drilled and a couple more “perches” to be nailed in. She used a chunk of an old stairway banister and balusters as her base, and scrounged-up a rough old board to be used as the top.